
The best automation is definitely one that is built into the platform or product. However, each business is unique, so there is also a need for custom automation. Today I will dig into the beginnings of writing PowerShell automation against a Cohesity cluster. I use PowerShell for a lot of system administration automation since I come from a Windows centered background and use PowerCLI to manage vSphere environments. Cohesity has a PowerShell module which is distributed through the PowerShell Gallery, making installation simple. I spent a while looking at the basics and example scripts, then extending some examples to fit what I wanted a little better. The resulting script is by no means ready to do anything useful, that will need to wait for a later post.

Disclosure: This post is part of my work with Cohesity.
I have posted a YouTube video if you would prefer to see me mistype some of these commands too.
Getting PowerShell on my MAC
I took the opportunity also to start using PowerShell Core on my MAC, rather than full PowerShell in a Windows VM. The first requirement was to install Brew https://brew.sh/, a package manager for MAC. From there, Brew is used to install PowerShell Core “brew cask install PowerShell” and then the Cohesity module for PowerShell Core is installed from a “pwsh” prompt with “Install-Module -Name Cohesity.PowerShell.Core” and we are ready to go. I used Visual Studio Code to edit on the Mac as well as on a Windows VM; DropBox synced the script between the two platforms.
Cohesity PowerShell Examples
The getting started guide for the Cohesity PowerShell module also has extensive documentation on the cmdlets that are included. On my Windows PC, I could use “Install-Module -Name Cohesity.PowerShell” to install the module and get started with the examples. The How to Use section includes some housekeeping to make sure the module is installed, as well as connecting to your cluster.
My Example Script
Rather than walk you through the same processes you can see in the video, we should look at my little example script. I made some slightly complex one-liners rather than splitting things across multiple lines for readability.
Connect-CohesityCluster -Server 192.168.111.22 -Credential (Get-Credential)

Write-Host "*** Upcoming Protection Jobs ***"

Get-CohesityProtectionJob | ForEach-Object { "Protection job {0} will start at {1:d2}:{2:d2}" -f ($_.Name, $_.StartTime.Hour, $_.StartTime.Minute)}

Write-Host "*** Recent open alerts ***"

Get-CohesityAlert -MaxAlerts 5 -AlertStates kOpen | ForEach-Object {$date = $_.LatestTimestampUsecs | Convert-CohesityUsecsToDateTime; "At {0} a {1} alert said: {2}" -f ($date, $_.Severity, $_.AlertDocument.AlertCause )}

Write-Host "*** Unprotected VMs ***"

$ProtectedIDs = (Get-CohesityProtectionJob -Environment "KVMware")[0].SourceIds

Get-CohesityVMwareVM | ForEach-Object {if (-not ($_.Id -in $ProtectedIDs)) {Write-Host $_.name "is not protected"} }
The first line asks us for a username and password, then uses them to connect to my Cohesity cluster.
Connect-CohesityCluster -Server 192.168.111.22 -Credential (Get-Credential)
To see a way to create the credential without prompting take a look at example 5 of the Get-Credential help page, just keep in mind that the password is in the script in plain text.

The third line gets all of the protection jobs on the cluster and displays some information about each job.
Get-CohesityProtectionJob | ForEach-Object { "Protection job {0} will start at {1:d2}:{2:d2}" -f ($_.Name, $_.StartTime.Hour, $_.StartTime.Minute)}
The for-each loop produces a piece of text about each protection job, there is no header line so I chose to make the text descriptive.

The Fifth line does a similar action with the five most recent open alerts on the cluster.
Get-CohesityAlert -MaxAlerts 5 -AlertStates kOpen | ForEach-Object {$date = $_.LatestTimestampUsecs | Convert-CohesityUsecsToDateTime; "At {0} a {1} alert said: {2}" -f ($date, $_.Severity, $_.AlertDocument.AlertCause )}
For both the protection job list and the alert list, the PowerShell native string formatting is used. Example number five on this post on the Hey, Scripting Guy! blog shows you a little of how it works.

Oops, my cluster is getting a bit full, time to expand its capacity.
One trap I did find is that the time stamps that are reported by the Cohesity module are not a standard format. I had to pipe the timestamp variables to “Convert-CohesityUsecsToDateTime” in order to get standard PowerShell date and time.
The Seventh line compiles a list of every VM that is included in a protection job on my cluster, I need this for the final line. Only the Cohesity internal VM identifier is stored in the list.
$ProtectedIDs = (Get-CohesityProtectionJob -Environment "KVMware")[0].SourceIds

Get-CohesityVMwareVM | ForEach-Object {if (-not ($_.Id -in $ProtectedIDs)) {Write-Host $_.name "is not protected"} }
The final line gathers all of the IDs of all the VMware VMs known to my Cohesity cluster, then checks is each one is in the list of protected VMs. If the VM is not protected then the command reports this issue.
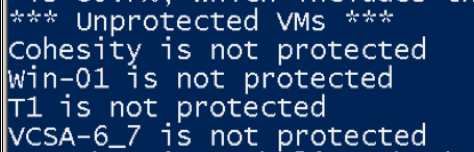
Looks like I haven’t included my new VCSA in a protection job, I’d better get on with that too.
Cohesity PowerShell Possibilities
There will always be a place for custom scripted solutions in enterprise IT. PowerShell is a common tool for automating IT administration tasks, so having a PowerShell module from Cohesity will enable the integration of Cohesity activities with other IT operational tasks in PowerShell and PowerCLI. I plan to spend some more time with the Cohesity PowerShell module, next by creating a plugin for the vCheck daily report package. I am also interested in how PowerShell could be used to keep a consistent configuration on a fleet of Cohesity clusters, possibly across a large ROBO deployment.
© 2019, Alastair. All rights reserved.

 RSS - Posts